Soil Solarization Heat Treatment: 2026 Guide for Growers
Soil Solarization Heat Treatment: 2026 Guide for Growers
Soil solarization heat treatment method is one of the most effective organic approaches for eliminating soil-borne pests, weeds, and pathogens without chemicals. This comprehensive guide for beginners covers everything you need to know about using solar power to sterilize your garden soil naturally. Whether you work in raised beds, containers, or open fields, solarization offers a sustainable solution for healthier crops.
What Is Soil Solarization?
Soil solarization is a heat treatment method that uses transparent plastic sheeting to trap solar radiation and raise soil temperatures to levels that kill harmful organisms. The technique works by creating a greenhouse effect over moist soil during the hottest months of the year. When done correctly, soil temperatures can reach 140°F (60°C) or higher at depths of up to 8 inches.
The Science Behind Solar Heat Sterilization
The process relies on moist soil because water conducts heat more effectively and makes organisms more vulnerable to high temperatures. As the plastic absorbs sunlight, the soil beneath heats up progressively. This sustained heat exposure disrupts the cellular structures of weeds, seeds, fungi, bacteria, nematodes, and insect larvae present in the top soil layers.
Benefits of the Soil Solarization Heat Treatment Method
Growers who adopt this technique enjoy numerous advantages for their agricultural operations. The method provides chemical-free weed control, reducing the need for herbicides that harm beneficial organisms. It also eliminates soil-borne diseases like fusarium wilt, verticillium wilt, and phytophthora without synthetic fumigants.
Additional benefits include improved soil structure from organic matter breakdown and reduced competition from invasive weed species. For those practicing organic farming, solarization is an EPA-exempt technique that maintains certification requirements. The cost is minimal, requiring only plastic sheeting and basic tools.
Step-by-Step Solarization Process for Maximum Effectiveness
Timing and Season Planning
Successful solarization requires proper timing to achieve maximum results. The ideal period falls during the hottest weeks of summer, typically June through August in most temperate regions. Your location's climate determines the exact window, but you need 4 to 6 consecutive days of clear, sunny weather with temperatures above 80°F (27°C).
Monitor local weather forecasts and plan your solarization project when extended heat waves are predicted. Northern regions may require longer treatment periods of 6 to 8 weeks to achieve equivalent results compared to southern areas.
Soil Preparation Steps
Begin by clearing all plant debris, previous crops, and visible weeds from the area. Till the soil to a depth of 8 to 12 inches to break up clods and create uniform texture. The soil should be finely textured to ensure even heat distribution throughout the treatment zone.
Moisten the soil thoroughly before covering. Water to field capacity, reaching depths of at least 12 inches. This moisture is critical because wet soil conducts heat five times better than dry soil. Wait 2 to 3 days after heavy rain before proceeding with solarization.
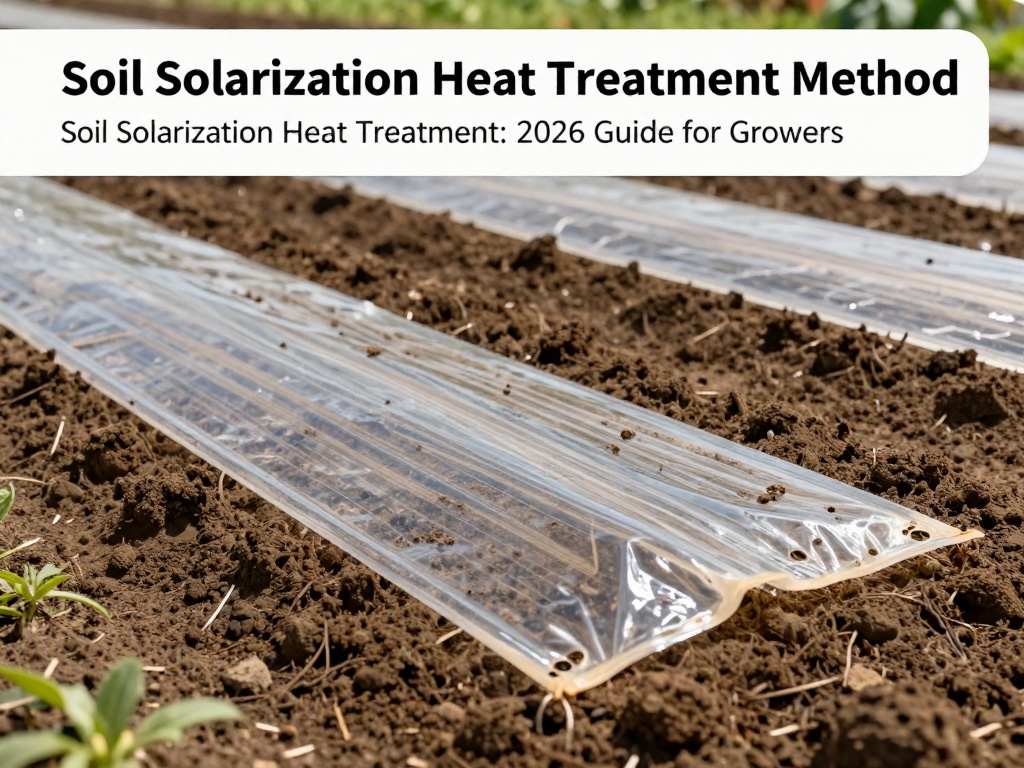
Selecting and Applying Plastic Sheeting
Choose clear polyethylene plastic with a thickness of 1 to 4 mil for optimal heat transmission. Thinner plastics allow more solar radiation to penetrate but tear more easily. For windy conditions, use 4-mil thickness. The plastic should be wide enough to extend 12 to 24 inches beyond the treatment area on all sides.
Lay the plastic smoothly across the prepared bed, eliminating wrinkles and air pockets. Bury the edges in soil trenches 6 inches deep to create an airtight seal. The goal is to prevent heat escape through convection and maintain consistent temperatures beneath the covering.
Solarization in Small Spaces and Containers
Growers with limited space can still benefit from this heat treatment method. Container gardeners can place potted soil in clear plastic bags during summer months. Seal the bags loosely and position them in full sun for 4 to 6 weeks. This approach works exceptionally well for potting mixes that harbor fungus gnats or damping-off pathogens.
Small raised beds respond excellently to solarization. Cover the entire bed structure with plastic sheeting, sealing edges carefully around the frame. The contained environment often reaches higher temperatures than open-field applications due to reduced heat loss from sides.
Treatment Duration and Success Indicators
Standard treatment duration ranges from 4 to 6 weeks during peak summer. Longer exposure periods up to 8 weeks provide more complete sterilization, especially for deep-rooted perennial weeds like bindweed and nutsedge. Research indicates that 6 weeks of solarization eliminates approximately 80 to 90 percent of annual weed seeds.
Success indicators include visible soil cracking, a distinct earthy smell from organic matter breakdown, and complete wilting of any surviving vegetation beneath the plastic. Darkened soil color indicates accelerated organic matter decomposition, which improves overall soil quality.
Limitations and Considerations
Soil solarization heat treatment method does have limitations that growers should understand. The technique primarily affects the top 8 to 12 inches of soil, leaving deeper root zones unaffected. Perennial weeds with deep taproots like thistle and dock may survive unless treated for extended periods.
Beneficial organisms including mycorrhizal fungi and nitrogen-fixing bacteria are also eliminated by this process. Re-inoculation through compost applications or cover cropping becomes necessary after treatment. Solarization is ineffective during cloudy periods, making it unsuitable for regions with persistent overcast summers.
Crops Suitable After Solarization
Most vegetables thrive when planted in solarized soil during the following season. Tomatoes, peppers, cucumbers, melons, squash, beans, and corn perform exceptionally well. Fall plantings of garlic and cool-season crops also benefit from the reduced pathogen pressure left by summer solarization.
Avoid planting immediately after plastic removal if the soil temperature remains elevated above 100°F (38°C). Allow 1 to 2 weeks for temperatures to normalize before seeding or transplanting. This cooling period prevents heat stress damage to young plant roots.
Combining Solarization with Other Organic Methods
Integrating solarization with additional organic approaches enhances overall soil health. Adding compost before covering creates a biological inoculum that re-establishes quickly after treatment. Incorporating beneficial Trichoderma fungi immediately after plastic removal outcompetes harmful pathogens for available niches.
Cover cropping with mustard or rapeseed after solarization provides further pest suppression through biofumigation effects. The combination creates a comprehensive IPM strategy that reduces reliance on any single control method while maximizing agricultural productivity.
Cost Analysis and Practical Tips
The soil solarization heat treatment method requires minimal investment compared to chemical alternatives. Clear polyethylene plastic costs approximately $0.02 to $0.05 per square foot, making large-scale applications economical. Quality plastic designed for agricultural use resists UV degradation for multiple seasons when handled carefully.
Practical tips include using earth staples or sandbags to secure plastic in windy conditions. Install soil thermometers at 6-inch depth to monitor treatment effectiveness. Keep records of application dates, weather conditions, and subsequent crop performance to refine your technique over seasons.
Environmental Impact and Sustainability
Soil solarization represents one of the most environmentally responsible pest management approaches available to modern growers. The process consumes no fossil fuels beyond plastic manufacturing and requires no protective equipment or specialized certifications. Residual plastic can be recycled after use, further reducing environmental footprint.
The method supports sustainable agriculture by maintaining soil microbiome diversity over time, unlike broad-spectrum chemical fumigants that create biological voids. Growers practicing regenerative agriculture appreciate how solarization fits within holistic soil management systems focused on long-term productivity.
FAQ
How long does soil solarization take to work?
Most soil solarization treatments require 4 to 6 weeks of continuous plastic coverage during hot summer months. Northern climates with less intense sunlight may need 6 to 8 weeks for equivalent results. The soil must remain covered continuously without removing the plastic during this period.
What month is best for solarizing soil?
July and August provide optimal conditions in most temperate regions, offering the longest days and highest solar intensity. In subtropical climates, June through September works well. Always schedule solarization during your region's peak heat period for maximum effectiveness.
Does solarization kill good bacteria in soil?
Yes, soil solarization eliminates both harmful and beneficial microorganisms in the topsoil layers. However, beneficial bacteria and fungi quickly re-establish from untreated soil below the treatment zone and from surrounding areas. Adding quality compost after treatment accelerates beneficial organism recovery.
Can I solarize soil in raised beds?
Solarization works excellently in raised beds and often achieves higher temperatures due to the contained environment. Cover the entire raised bed with clear plastic, sealing edges carefully around the bed frame. The walls retain heat effectively, making this an ideal application for small-space gardeners.
What is the difference between clear and black plastic for solarization?
Clear plastic is essential for effective solarization because it allows sunlight to pass through and heat the soil directly. Black plastic absorbs heat at the surface but prevents solar penetration into the soil below, making it ineffective for this purpose. Always use clear polyethylene for heat treatment.
How much does soil solarization cost compared to chemical treatment?
Soil solarization costs approximately $50 to $150 per 1,000 square feet for plastic sheeting alone, making it significantly cheaper than professional chemical fumigation, which can cost $1,000 or more per acre. The only additional expenses are water for soil moistening and labor for installation.
Will solarization eliminate all weeds permanently?
Solarization kills weed seeds and seedlings in the top 2 to 3 inches of soil, eliminating approximately 80 to 90 percent of annual weeds. Perennial weeds with deep root systems may regrow from below the treatment zone. New weeds will eventually re-establish from seeds dispersed by wind, birds, and garden activities.
0 Response to "Soil Solarization Heat Treatment: 2026 Guide for Growers"
Post a Comment